How to Add a New Project
Site Report Pro allows you to add and store multiple projects. Projects are used to capture, manage and report all issues of a site inspection, site audit or safety inspection. Issues can be a snag or problem that needs to be solved, or a task that needs to be completed. This collection of issues is often referred to as a punch list.
1 Navigate to the Projects tab
Open Site Report Pro and tap the Projects tab at the bottom of the screen.
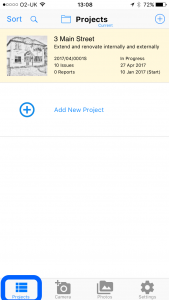
2 Tap the + button to add a new project
Tap the + button in the top right corner to start creating a new project.

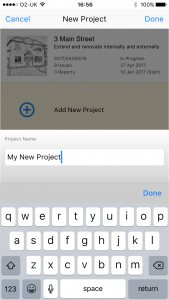
3 Enter your project name
Type a name for your new project in the text field provided.
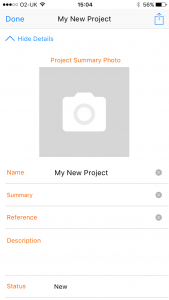
4 Add a photograph and fill in any additional project details
Add a cover photo for your project and complete any additional fields such as address, client name and project number.
Tip: You can also start a project directly from a photo. Take a photo first and Site Report Pro will create the project for you.
In the tab menu at the bottom of the screen, tap the Camera button to take a new photo or tap the Photos button to browse the photo library of your device. When you have taken / selected your photos, tap Add as New Project. The project details can then be entered by tapping the Project Details button.
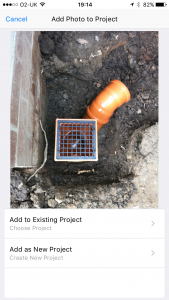
In the tab menu at the bottom of the screen, tap the Camera button to take a new photo or tap the Photos button to browse the photo library of your device. When you have taken / selected your photos, tap Add as New Project. The project details can then be entered by tapping the Project Details button.